
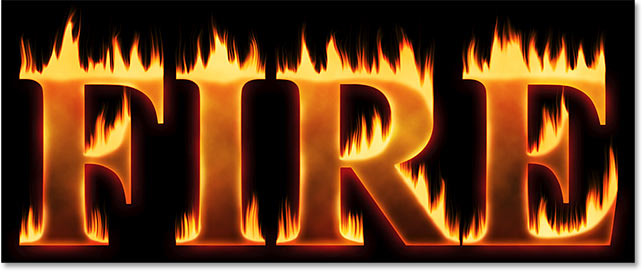
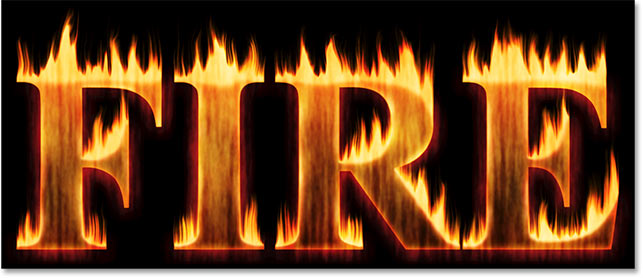
Create Flaming Hot Fire Effect Text in Photoshop ( D education Online Classes)

Part 1: Adding the text.
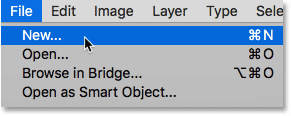
Step 1: Create a new Photoshop document
एक नया फ़ोटोशॉप दस्तावेज़ बनाकर प्रारंभ करें। मेनू बार में फ़ाइल मेनू पर जाएं और नया चुनें:
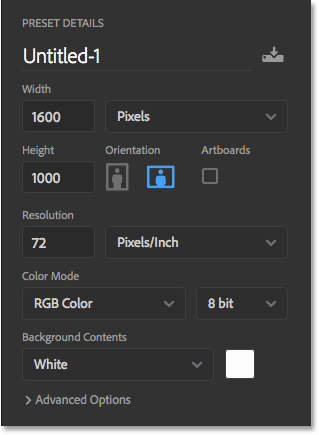
इस ट्यूटोरियल के लिए, अपने दस्तावेज़ की चौड़ाई को 1600 पिक्सेल, ऊँचाई को 1000 पिक्सेल और रिज़ॉल्यूशन को 72 पिक्सेल/इंच पर सेट करें। पृष्ठभूमि सामग्री को अभी के लिए सफेद पर सेट होने दें। और फिर दस्तावेज़ बनाने के लिए, आप फ़ोटोशॉप के किस संस्करण का उपयोग कर रहे हैं, इसके आधार पर बनाएं या ठीक क्लिक करें:
Step 2: Fill the new document with black
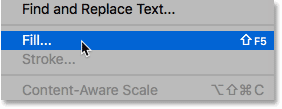
संपादन मेनू पर जाकर और भरण चुनकर दस्तावेज़ की पृष्ठभूमि को सफेद से काले रंग में बदलें:
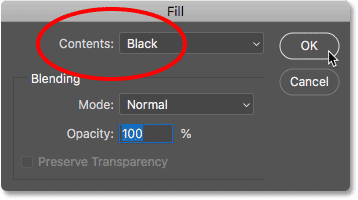
भरण संवाद बॉक्स में, सामग्री को काला पर सेट करें और फिर ठीक क्लिक करें:
फ़ोटोशॉप पृष्ठभूमि को काले रंग से भर देता है:
Step 3: Add your text
टेक्स्ट जोड़ने के लिए, टूलबार से टाइप टूल को पकड़ें:
विकल्प बार में, अपना फ़ॉन्ट चुनें। मैं टाइम्स न्यू रोमन बोल्ड जैसे कुछ सरल के साथ जाऊंगा। हमें अभी के लिए सबसे बड़ा प्रीसेट आकार देने के लिए प्रकार का आकार 72 पीटी पर सेट करें:

अभी भी विकल्प बार में, कलर स्वैच पर क्लिक करके टाइप कलर को सफेद पर सेट करें:

और फिर कलर पिकर में व्हाइट को चुनना। इसे बंद करने के लिए ठीक क्लिक करें: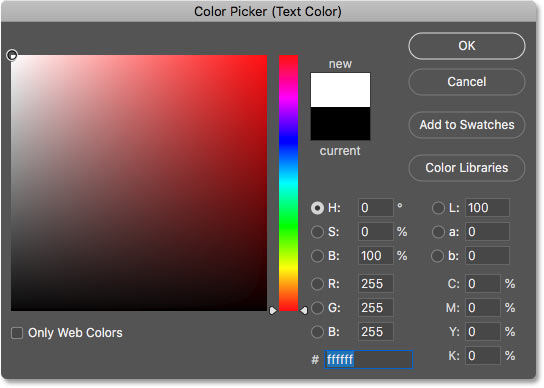
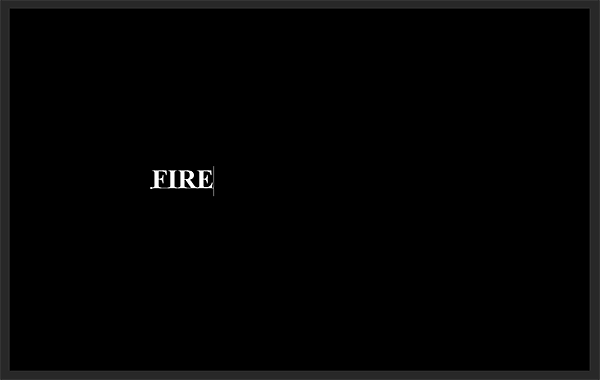
अपने फ़ॉन्ट और प्रकार के रंग के साथ, दस्तावेज़ के अंदर क्लिक करें और अपना टेक्स्ट जोड़ें। मैं "FIRE" शब्द लिखूंगा। टेक्स्ट बहुत छोटा दिखाई देगा लेकिन हम इसे आगे ठीक कर देंगे:
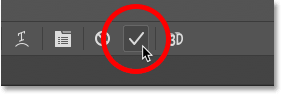
इसे स्वीकार करने के लिए, विकल्प बार में चेकमार्क पर क्लिक करें:
Step 4: Resize and move the text with Free Transform
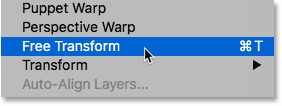
टेक्स्ट का आकार बदलने के लिए, एडिट मेन्यू पर जाएं और फ्री ट्रांसफॉर्म चुनें:
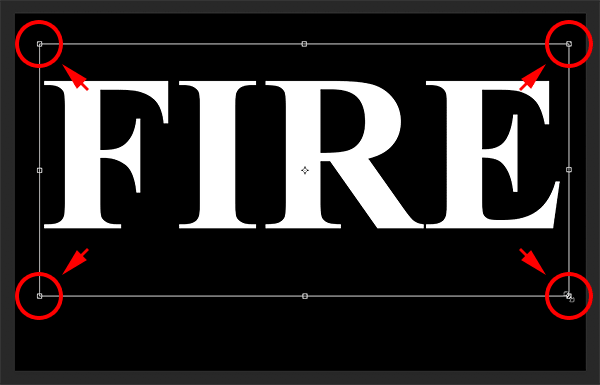
फिर अपनी Shift कुंजी को दबाकर रखें और किसी भी कोने के हैंडल को बाहर की ओर खींचें. Shift कुंजी को पकड़े रहने से अक्षरों की आकृतियाँ जगह-जगह लॉक हो जाती हैं, ताकि आप उन्हें विकृत न करें। जब आप कर लें, तो अपना माउस बटन छोड़ दें, और फिर अपनी Shift कुंजी छोड़ दें:
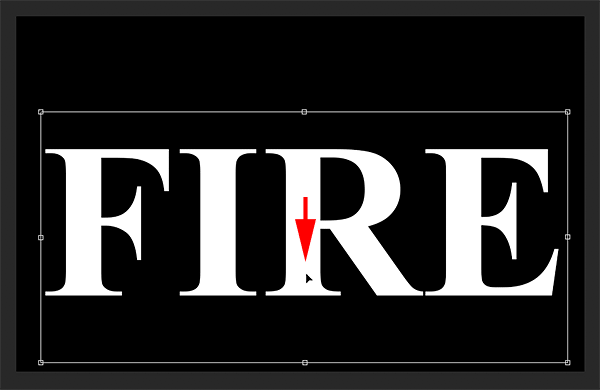
टेक्स्ट को स्थानांतरित करने के लिए, फ्री ट्रांसफॉर्म बॉक्स के अंदर क्लिक करें और इसे जगह पर खींचें। दस्तावेज़ के निचले आधे हिस्से में पाठ को नीचे की ओर खींचकर लपटों के लिए अक्षरों के शीर्ष पर जगह बनाएं:
इसे स्वीकार करने के लिए, विकल्प बार में फिर से चेकमार्क पर क्लिक करें:

Part 2: Drawing the flames around the text
Step 5: Rasterize the type
लेयर्स पैनल में, हम अपने टेक्स्ट को बैकग्राउंड लेयर के ऊपर टाइप लेयर पर देखते हैं: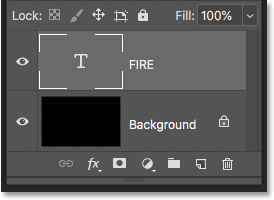
टाइप लेयर पर राइट-क्लिक (जीत) / कंट्रोल-क्लिक (मैक) द्वारा टेक्स्ट को पिक्सल में कनवर्ट करें और मेनू से रास्टराइज टाइप चुनें:
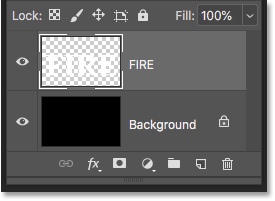
Photoshop converts the text into a normal layer:
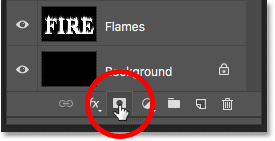
Step 6: Duplicate the text layer
लेयर पैनल के नीचे न्यू लेयर आइकन पर लेयर को नीचे खींचकर उसकी एक कॉपी बनाएं:

Step 7: Turn the copy off
मूल के ऊपर एक प्रति दिखाई देती है। इसके दृश्यता आइकन पर क्लिक करके कॉपी को अभी के लिए बंद करें: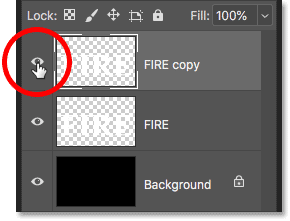
Step 8: Select the original text layer
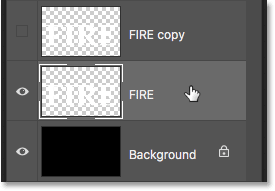
फिर इसे चुनने के लिए मूल टेक्स्ट लेयर पर क्लिक करें:
Learn all about Layers with our complete Learning Guide!
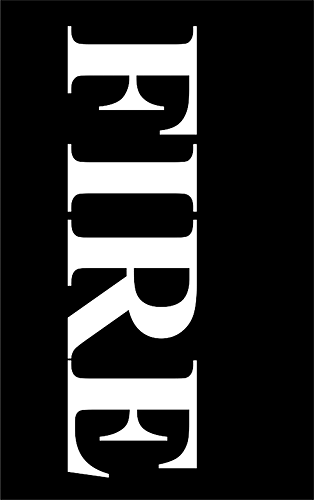
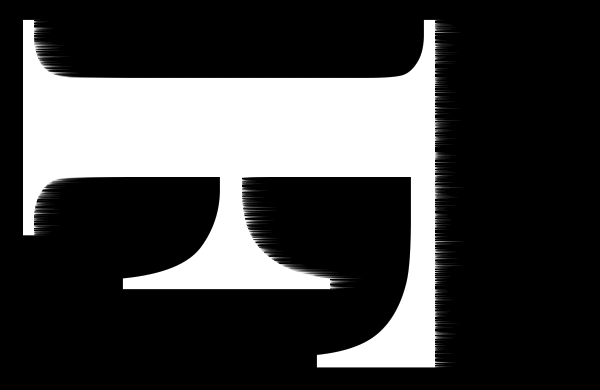
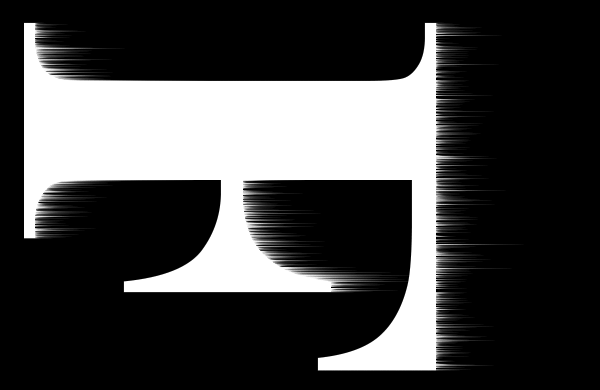
Step 9: Rotate the text 90° clockwise
हम अपनी लपटें बनाने के लिए तैयार हैं, और हम फोटोशॉप के विंड फिल्टर को लागू करके शुरू करेंगे। समस्या यह है कि विंड फिल्टर केवल बाएं से दाएं या दाएं से बाएं काम करता है। यह लंबवत रूप से काम नहीं करता है, और हमें अपनी लपटों को यह देखने की आवश्यकता है कि वे अक्षरों से ऊपर उठ रही हैं। इसलिए, इससे पहले कि हम फ़िल्टर लागू करें, हमें पहले टेक्स्ट को घुमाना होगा। छवि मेनू पर जाएं, छवि रोटेशन चुनें, और फिर 90° दक्षिणावर्त चुनें: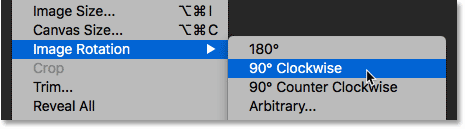
यह टेक्स्ट सहित पूरे दस्तावेज़ को अपनी तरफ घुमाता है:
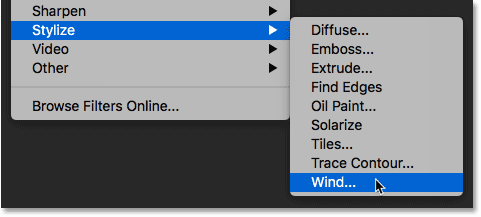
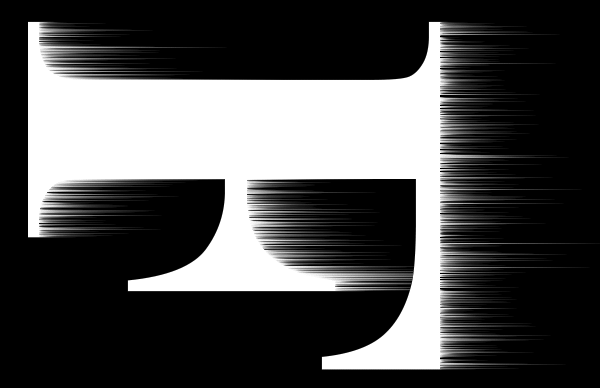
Step 10: Apply the Wind filter
टेक्स्ट घुमाए जाने के साथ, फ़िल्टर मेनू पर जाएं, स्टाइलिज़ चुनें, और फिर विंड चुनें:
विंड डायलॉग बॉक्स में, मेथड टू विंड और डायरेक्शन टू फ्रॉम लेफ्ट सेट करें और फिर ओके पर क्लिक करें:
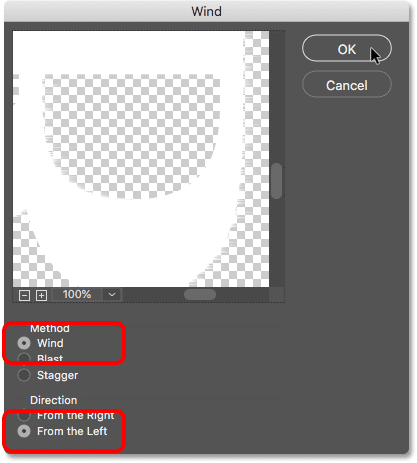
यदि आप बारीकी से देखें, तो आप देखेंगे कि प्रत्येक अक्षर के दाहिने किनारों के साथ बाहर की ओर फैली हुई छोटी-छोटी धारियाँ या स्पाइक्स हैं। यहाँ मैंने उन्हें देखने में आसान बनाने के लिए F अक्षर पर ज़ूम इन किया है:
Step 11: Re-apply the Wind filter two more times
धारियों को लंबा करने के लिए, विंड फ़िल्टर को फिर से लागू करें। फ़िल्टर मेनू पर वापस जाएं, और चूंकि विंड अंतिम फ़िल्टर था जिसे हमने लागू किया था, आप इसे सूची के शीर्ष पर पाएंगे:
इसे दूसरी बार चलाने के बाद, धारियाँ अधिक दिखाई देती हैं:
विंड फ़िल्टर को फ़िल्टर मेनू के शीर्ष से फिर से चुनकर तीसरी बार लागू करें:
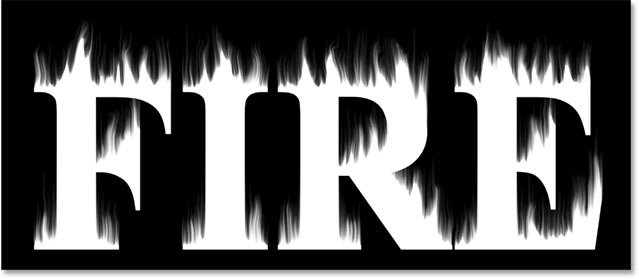
और अब धारियाँ उतनी ही लंबी हैं जितनी हमें चाहिए:
Step 12: Rotate the text 90° counter clockwise
हमने विंड फ़िल्टर का काम पूरा कर लिया है, इसलिए इमेज मेन्यू पर जाकर, इमेज रोटेशन को चुनकर, और इस बार, 90° काउंटर क्लॉकवाइज चुनकर टेक्स्ट को उसके मूल ओरिएंटेशन में वापस घुमाएँ: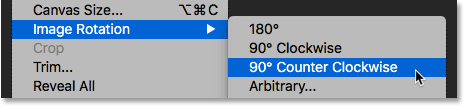
पाठ घुमाए जाने के साथ, धारियाँ अब ऊपर की ओर ऊपर की ओर उठती हैं: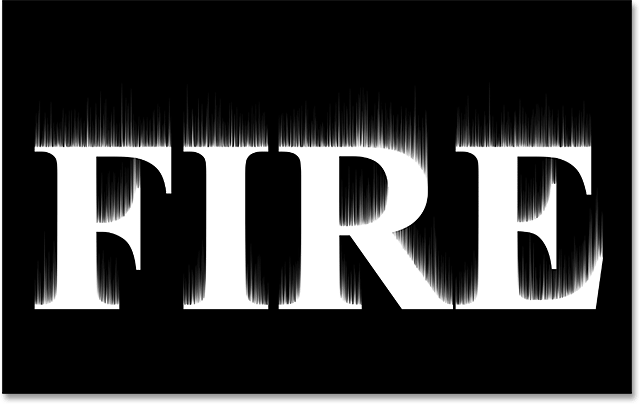
Step 13: Apply the Gaussian Blur filter
धारियों को नरम करने के लिए, कुछ धुंधलापन लागू करें। फ़िल्टर मेनू पर जाएं, ब्लर चुनें और फिर गाऊसी ब्लर चुनें:
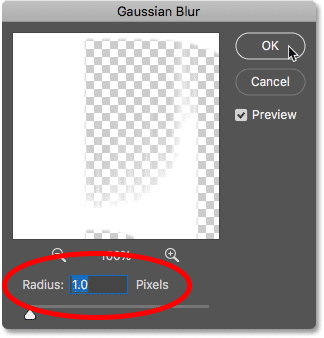
गाऊसी ब्लर संवाद बॉक्स में, लगभग 1 पिक्सेल का निम्न त्रिज्या मान चुनें, और फिर ठीक क्लिक करें:
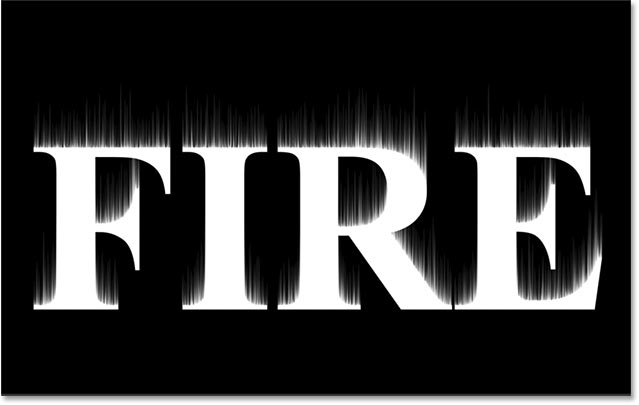
धारियाँ अब उन पर एक नरम नज़र रखती हैं:
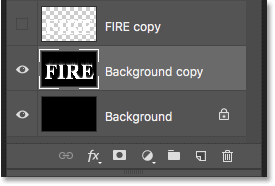
Step 14: Duplicate the Background layer
लेयर्स पैनल में वापस, बैकग्राउंड लेयर को न्यू लेयर आइकन पर नीचे खींचकर उसकी एक कॉपी बनाएं:
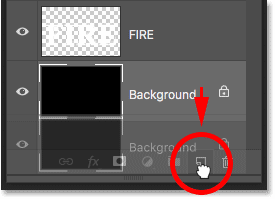
मूल के ऊपर एक प्रति दिखाई देती है:
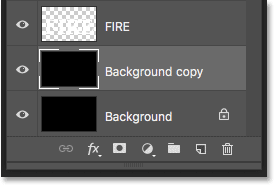
Step 15: Merge the text and Background copy layers
Merge the text layer with the "Background copy" layer by clicking on the text layer to select it:
और फिर लेयर पर राइट-क्लिक (जीत) / कंट्रोल-क्लिक (मैक) और मेनू से मर्ज डाउन चुनें:
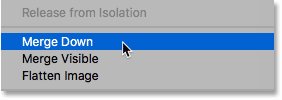
यह दोनों परतों को एक परत में मिला देता है:
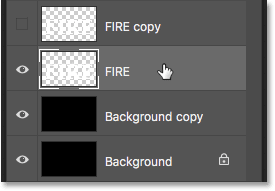
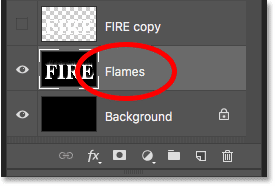
Step 16: Rename the merged layer "Flames"
इसे हाइलाइट करने के लिए "बैकग्राउंड कॉपी" नाम पर डबल-क्लिक करें, और फिर "फ्लेम्स" परत का नाम बदलें। इसे स्वीकार करने के लिए एंटर (जीत) / रिटर्न (मैक) दबाएं:
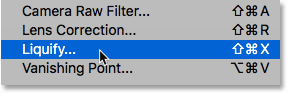
Step 17: Draw flames with the Liquify filter
चयनित "लपटें" परत के साथ, फ़िल्टर मेनू पर जाएं और द्रवीकरण चुनें:
Select the Forward Warp Tool
लिक्विफाई फिल्टर डायलॉग बॉक्स में, सुनिश्चित करें कि फॉरवर्ड ताना टूल बाईं ओर टूलबार में चुना गया है:

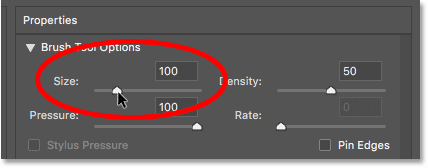
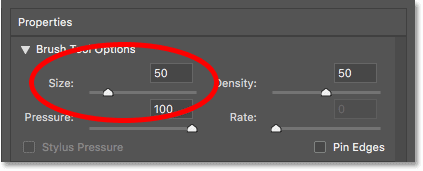
Set the brush size
Then, in the Brush Tool Options on the right, set the Size of your brush to around 100 pixels:
Warp the streaks
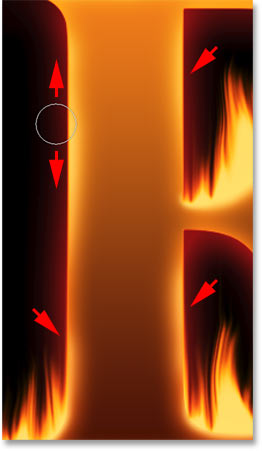
पहली चीज जो हमें करने की जरूरत है, वह है विंड फिल्टर के साथ बनाई गई स्ट्रीक्स को और अधिक समझदार लुक देना। अलग-अलग स्थानों पर स्ट्रीक्स के अंदर क्लिक करें और अपने माउस को थोड़ी दूरी पर खींचें, या तो बाएँ या दाएँ, धीरे से उन्हें ताना देने और सूक्ष्म, यादृच्छिक वक्र बनाने के लिए। बस क्लिक करें, खींचें, अपना माउस बटन छोड़ें, और फिर एक अलग क्षेत्र में फिर से क्लिक करें और खींचें। कोशिश करें कि अभी के लिए खुद अक्षरों के अंदर क्लिक न करें। बस धारियों को ताना और झुलाएं: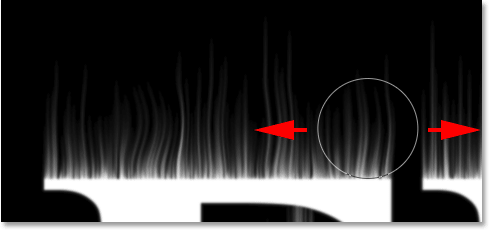
Fix mistakes with the Reconstruct Tool
यदि आप कोई गलती करते हैं, तो Ctrl+Z (Win) / Command+Z (Mac) दबाकर अपने अंतिम चरण को पूर्ववत करें। या, टूलबार से पुनर्निर्माण उपकरण का चयन करें और फिर लागू किए गए युद्ध को पूर्ववत करने के लिए क्षेत्र पर पेंट करें। एक बार जब आप गलती को दूर कर लेते हैं, तो फॉरवर्ड वॉर्प टूल पर वापस जाएँ और स्ट्रीक्स को ताना मारना जारी रखें:
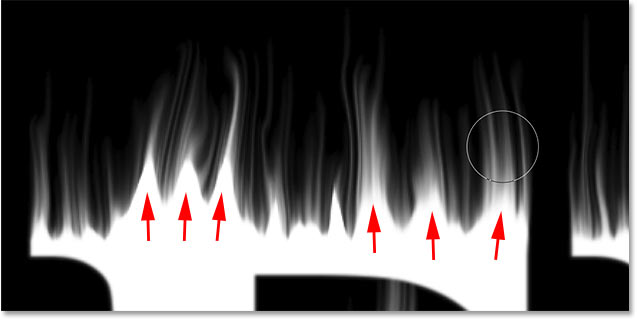
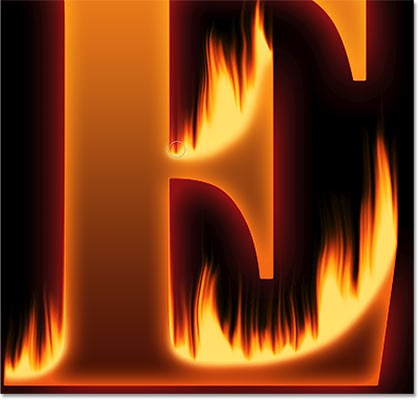
अक्षरों के मध्य और निचले भाग में धारियों को शामिल करना न भूलें। यदि आपको अपने ब्रश के आकार को समायोजित करने की आवश्यकता है, तो अपने कीबोर्ड पर बाएँ और दाएँ ब्रैकेट कुंजियाँ दबाएँ। बायां ब्रैकेट ( [ ) ब्रश को छोटा बनाता है और दायां ब्रैकेट ( ] ) इसे बड़ा बनाता है। जब आप काम पूरा कर लें, तो आपको कुछ ऐसा ही मिलना चाहिए जो मेरे पास यहाँ है:

Lower the brush size and draw small flames
ब्रश टूल विकल्पों में वापस, अपने ब्रश का आकार लगभग 20 पिक्सेल तक कम करें:
![]()
इस बार, छोटी लपटें बनाने के लिए, अक्षरों के अंदर क्लिक करें और ऊपर की ओर स्ट्रीक्स में खींचें। विविधता के लिए अलग-अलग दिशाओं में खींचने की कोशिश करें, या अतिरिक्त प्रभाव के लिए स्ट्रीक्स के पथ का अनुसरण करें:
फिर से यदि आप कोई गलती करते हैं, तो अपने अंतिम चरण को पूर्ववत करने के लिए Ctrl+Z (जीतें) / Command+Z (Mac) दबाएं। जब आप अक्षरों के शीर्ष के साथ काम कर लें, तो नीचे और मध्य वर्गों के साथ भी ऐसा ही करें। परिणाम कुछ इस तरह दिखना चाहिए:
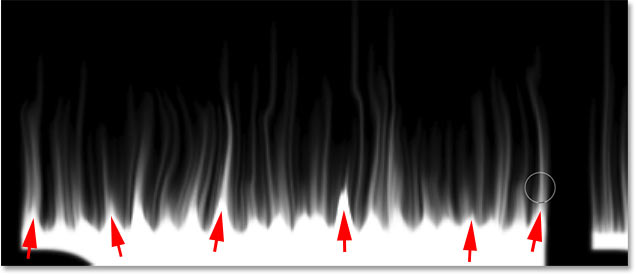
Increase the brush size and draw larger flames
अपने ब्रश का आकार लगभग 50 पिक्सेल तक बढ़ाएँ:
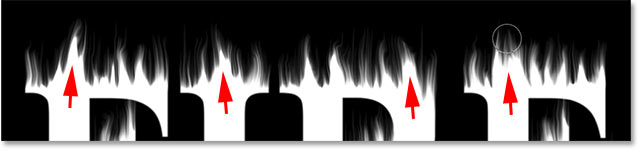
फिर अक्षरों के अंदर यादृच्छिक स्थानों पर क्लिक करें और बड़ी लपटें बनाने के लिए ऊपर की ओर खींचें। विविधता के लिए फिर से अलग-अलग दिशाओं में खींचें:
यहाँ बड़ी लपटों को जोड़ने के बाद मेरा परिणाम है:
Increase the brush size and draw the largest flames
अंत में, अपने ब्रश का आकार लगभग 70 पिक्सेल तक बढ़ाएँ:
![]()
और फिर शीर्ष पर कुछ और भी बड़ी लपटें जोड़ने के लिए क्लिक करें और खींचें। प्रति पत्र एक को यह करना चाहिए:
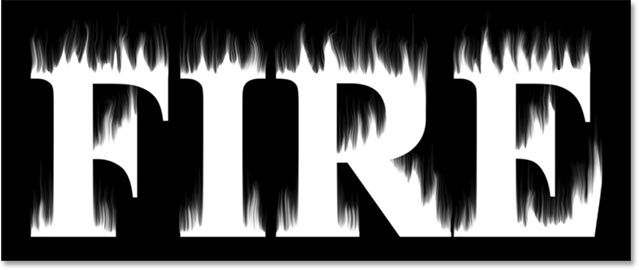
जब आपका काम हो जाए, तो लिक्विड फिल्टर को बंद करने के लिए ओके पर क्लिक करें, और यहां मेरा परिणाम है:
Step 18: Add two Hue/Saturation adjustment layers
इस समय हमारी लपटें सफेद हैं, तो चलिए उनमें कुछ रंग मिलाते हैं।
Add the first Hue/Saturation adjustment layer
लेयर्स पैनल में, नीचे न्यू फिल या एडजस्टमेंट लेयर आइकन पर क्लिक करें:
![]()
फिर सूची से ह्यू/संतृप्ति चुनें:
समायोजन परत सीधे "लपटें" परत के ऊपर दिखाई देती है:

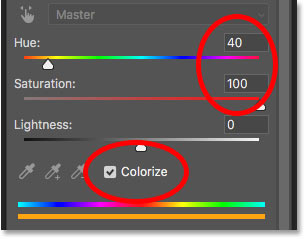
और समायोजन परत के लिए नियंत्रण और विकल्प फ़ोटोशॉप के गुण पैनल में दिखाई देते हैं। सबसे पहले Colorize ऑप्शन को ऑन करें। फिर ह्यू मान को 40 और संतृप्ति को 100 पर सेट करें:
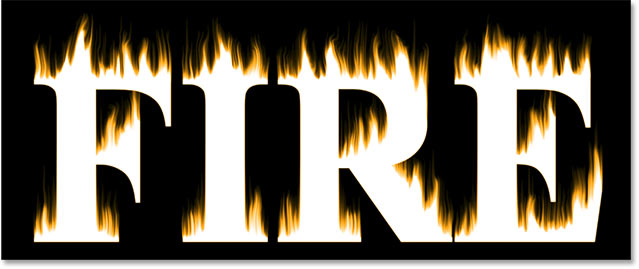
यह आग की लपटों के शीर्ष पर एक गर्म पीला जोड़ता है:
Add a second Hue/Saturation adjustment layer
परत पैनल में नई भरण या समायोजन परत आइकन पर फिर से क्लिक करके दूसरी ह्यू/संतृप्ति समायोजन परत जोड़ें:
![]()
और सूची से ह्यू/संतृप्ति चुनना:
गुण पैनल में, इस बार Colorize विकल्प को अनियंत्रित छोड़ दें, और ह्यू मान को -15 पर सेट करें:

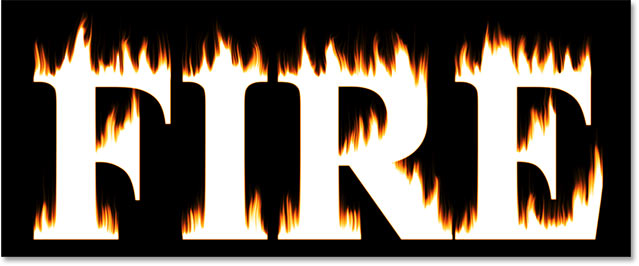
इससे लपटों का रंग पीले से नारंगी में बदल जाता है:
Step 19: Change the blend mode to Overlay
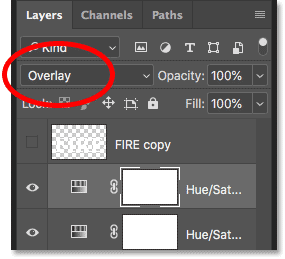
दो ह्यू/संतृप्ति समायोजन परतों के रंगों को एक साथ मिलाने के लिए, दूसरे के सम्मिश्रण मोड को सामान्य से ओवरले में बदलें:
यह नारंगी और पीले दोनों को एक साथ मिलाता है:
Step 20: Add a Levels adjustment above the "Flames" layer
शेष सफेद क्षेत्रों को पीले रंग में बदलने के लिए, "लपटें" परत का चयन करें:
फिर न्यू फिल या एडजस्टमेंट लेयर आइकन पर क्लिक करें:
![]()
और इस बार, स्तर चुनें:
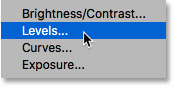
फ़ोटोशॉप सीधे "लपटें" परत के ऊपर स्तर समायोजन परत जोड़ता है:
Step 21: Lower the max-brightness Output level
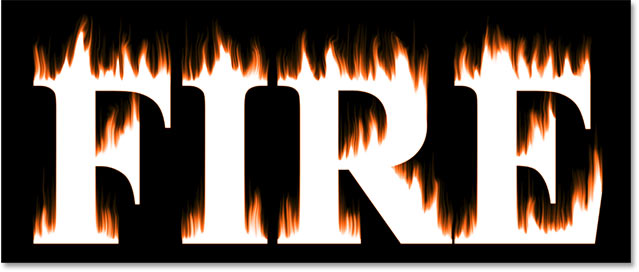
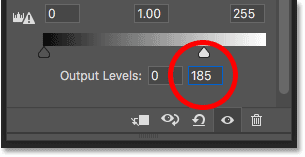
गुण पैनल में, आप आउटपुट स्तर के लिए दो मान देखेंगे; एक को 0 पर और दूसरे को 255 पर सेट किया जाता है। पहला मान समायोजन परत के नीचे की परतों के न्यूनतम चमक स्तर को नियंत्रित करता है, और दूसरा अधिकतम चमक को नियंत्रित करता है। लपटों और पाठ को सफेद से पीले रंग में फीका करने के लिए, दूसरा मान 255 से घटाकर 185 कर दें::
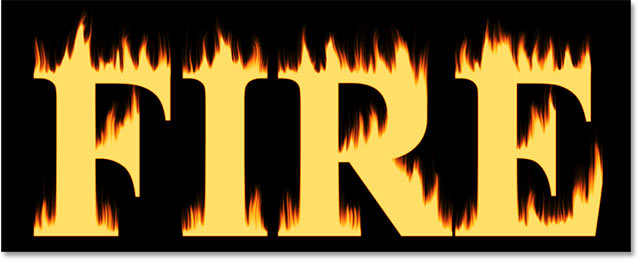
और यहाँ परिणाम है। सफेद क्षेत्र अब पीले हो गए हैं, लेकिन नारंगी हाइलाइट अभी भी आग की लपटों के शीर्ष पर बने हुए हैं:
Part 4: Coloring the text
अब जब हमने लपटों में कुछ रंग जोड़ लिया है, तो आइए टेक्स्ट को ही रंग दें। और हम फोटोशॉप के लेयर इफेक्ट्स का उपयोग करके ऐसा करेंगे।
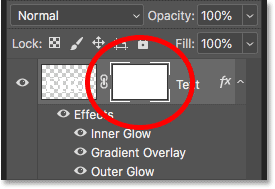
Step 22: Select and turn on the top layer
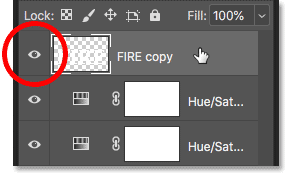
परत पैनल में वापस, इसे चुनने के लिए शीर्ष परत ("FIRE कॉपी" परत) पर क्लिक करें, और फिर इसके दृश्यता आइकन पर क्लिक करके परत को चालू करें:
Step 23: Rename the layer
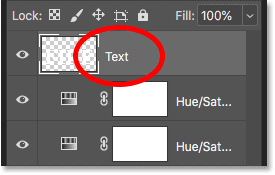
चूंकि यह हमारी मुख्य टेक्स्ट लेयर है, इसे हाइलाइट करने के लिए इसके नाम पर डबल-क्लिक करें, और फिर "टेक्स्ट" लेयर का नाम बदलें। इसे स्वीकार करने के लिए एंटर (जीत) / रिटर्न (मैक) दबाएं:
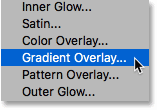
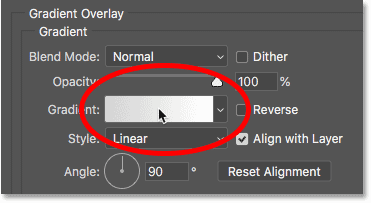
Step 24: Add a Gradient Overlay layer effect
चयनित "टेक्स्ट" परत के साथ, परत पैनल के निचले भाग में परत शैलियाँ आइकन ("fx" आइकन) पर क्लिक करें:
![]()
और फिर सूची से ग्रेडिएंट ओवरले चुनें:
Resetting the gradient defaults
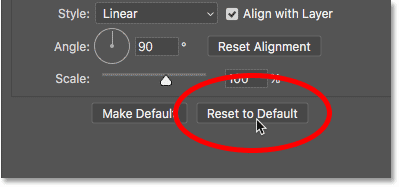
उसका फ़ोटोशॉप का लेयर स्टाइल डायलॉग बॉक्स ग्रैडिएंट ओवरले विकल्पों पर सेट हो जाता है। सबसे पहले, यह सुनिश्चित करने के लिए कि हम डिफ़ॉल्ट सेटिंग्स से शुरू कर रहे हैं, डिफ़ॉल्ट पर रीसेट करें बटन पर क्लिक करें:
Editing the gradient
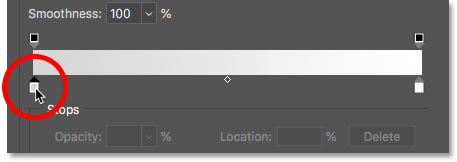
ग्रेडिएंट संपादित करने के लिए, रंग नमूने पर क्लिक करें:
ग्रेडिएंट एडिटर में, ग्रेडिएंट के बाएँ सिरे के नीचे रंग स्टॉप पर डबल-क्लिक करें:
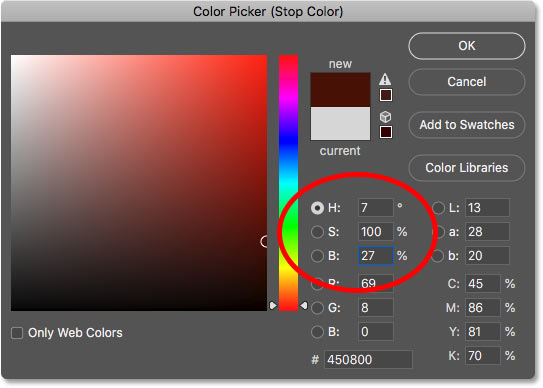
फिर, कलर पिकर में, ह्यू (H) मान को 7, संतृप्ति (S) मान को 100 और ब्राइटनेस (B) मान को 27 पर सेट करके गहरे लाल रंग का चयन करें। कलर पिकर को बंद करने के लिए ओके पर क्लिक करें:
ग्रेडिएंट एडिटर में वापस, ग्रेडिएंट के दाहिने सिरे के नीचे कलर स्टॉप पर डबल-क्लिक करें:
और कलर पिकर में, ह्यू को 30, सैचुरेशन को 95 और ब्राइटनेस को 96 पर सेट करके एक ब्राइट ऑरेंज चुनें:
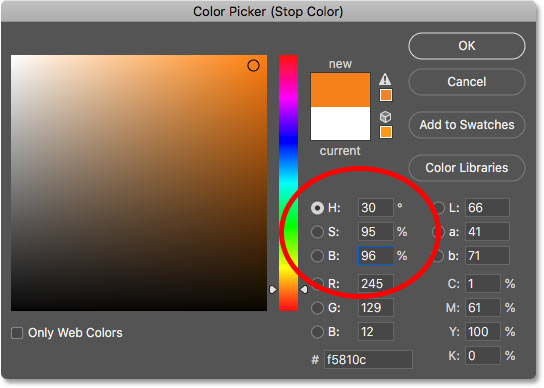
कलर पिकर को बंद करने के लिए ओके पर क्लिक करें, और फिर ग्रेडिएंट एडिटर को बंद करने के लिए ओके पर क्लिक करें, लेकिन लेयर स्टाइल डायलॉग बॉक्स को खुला छोड़ दें। पाठ अब ढाल के साथ रंगीन है:
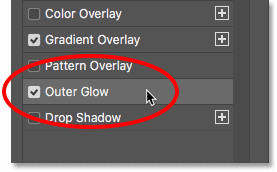
Step 25: Add an Outer Glow layer style
परत शैली संवाद बॉक्स में, बाईं ओर प्रभावों की सूची से बाहरी चमक चुनें:
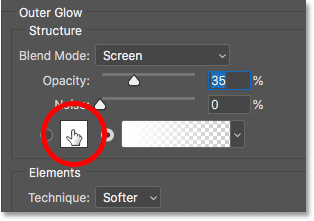
फिर, आउटर ग्लो विकल्पों में, ग्लो का रंग बदलने के लिए कलर स्वैच पर क्लिक करें:
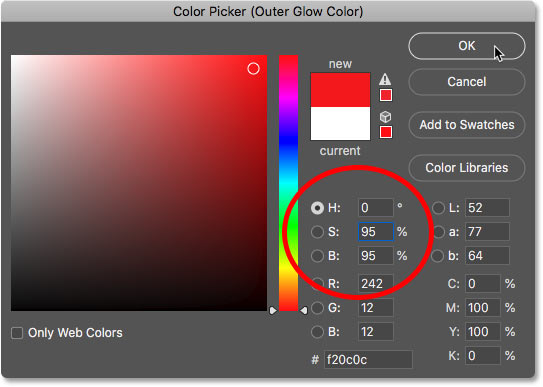
और कलर पिकर में, एक चमकदार लाल चुनें। मैं अपना ह्यू मान 0 पर, संतृप्ति को 95 पर और ब्राइटनेस को भी 95 पर सेट करूंगा। फिर कलर पिकर को बंद करने के लिए ओके पर क्लिक करें:
बाहरी चमक विकल्पों में वापस, चमक की चमक को नियंत्रित करने के लिए अपारदर्शिता को समायोजित करें, और उस दूरी को नियंत्रित करने के लिए आकार जो चमक पाठ से बाहर की ओर फैली हुई है। मैं अपनी अपारदर्शिता को 60% और आकार को 40 पिक्सेल पर सेट करूँगा:
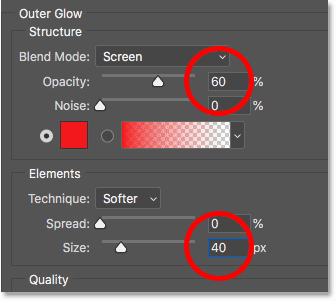
अक्षरों के चारों ओर लाल चमक का प्रभाव यहां दिया गया है:
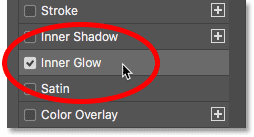
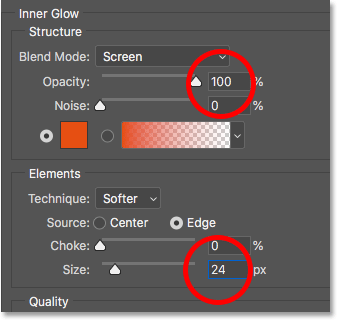
Step 26: Add an Inner Glow
अभी भी परत शैली संवाद बॉक्स में, बाईं ओर आंतरिक चमक चुनें:
इनर ग्लो विकल्पों में, कलर स्वैच पर क्लिक करें:
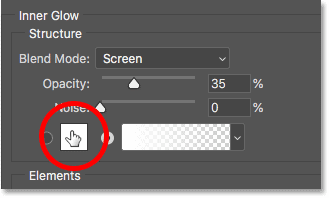
और कलर पिकर में, एक चमकीला नारंगी चुनें। मैं ह्यू को 20 पर, सैचुरेशन को 100 पर और ब्राइटनेस को 90 पर सेट कर दूँगा। जब आपका काम पूरा हो जाए तो कलर पिकर को बंद करने के लिए ओके पर क्लिक करें:

और अंत में, इनर ग्लो विकल्पों में वापस, अपारदर्शिता को 100% तक बढ़ाएं, फिर आकार को लगभग 24 पिक्सेल पर सेट करें:
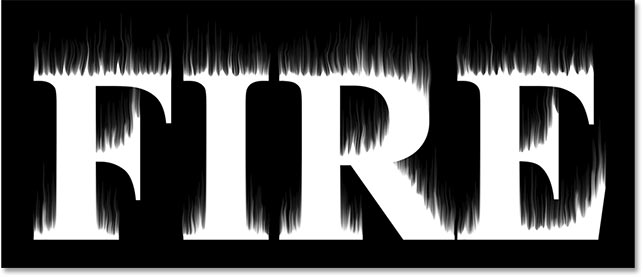
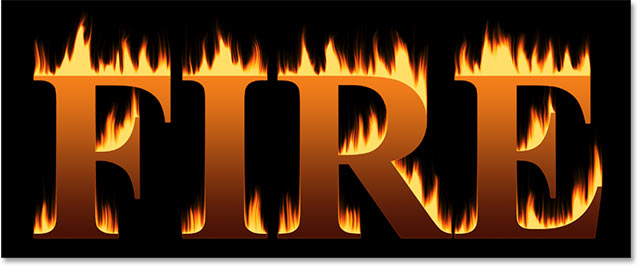
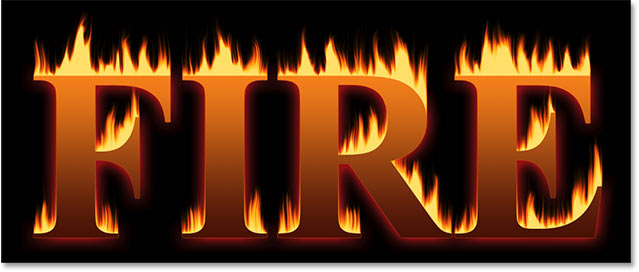
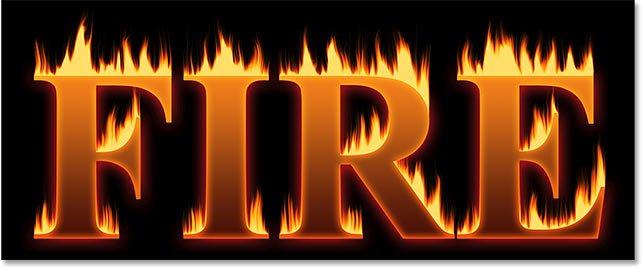
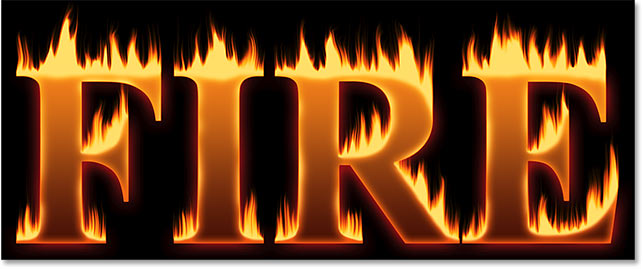
हमने अपनी परत शैलियों के साथ काम किया है, इसलिए परत शैली संवाद बॉक्स को बंद करने के लिए ठीक क्लिक करें। टेक्स्ट पर लागू सभी तीन परत प्रभावों के साथ परिणाम यहां दिया गया है:
Part 5: Blending the text with the flames
फिलहाल, टेक्स्ट ऐसा लगता है जैसे वह आग की लपटों के सामने बैठा हो। हम एक लेयर मास्क का उपयोग करके टेक्स्ट को आग की लपटों में मिला देंगे।
Step 27: Add a layer mask to the text layer
"टेक्स्ट" परत अभी भी सक्रिय है, परत पैनल के निचले भाग में परत मास्क जोड़ें आइकन पर क्लिक करें:
"टेक्स्ट" परत के पूर्वावलोकन थंबनेल के बगल में एक सफेद परत मुखौटा थंबनेल दिखाई देता है:
Step 28: Select the Brush Tool
टूलबार से ब्रश टूल को पकड़ें:
Step 29: Set your brush color to black
हमें लेयर मास्क पर काले रंग से पेंट करने की आवश्यकता है, इसलिए सुनिश्चित करें कि आपका अग्रभूमि रंग (ब्रश रंग) काला है:

Step 30: Paint along the letter edges to blend in the flames
ब्रश विकल्पों को लाने के लिए दस्तावेज़ के अंदर राइट-क्लिक (जीत) / कंट्रोल-क्लिक (मैक)। फिर हार्डनेस को 0% तक कम करें ताकि आप एक सॉफ्ट ब्रश से पेंटिंग कर रहे हों, और साइज को 30-40 px के बीच सेट करें। ब्रश विकल्प बंद करने के लिए एंटर (जीतें) / रिटर्न (मैक) दबाएं: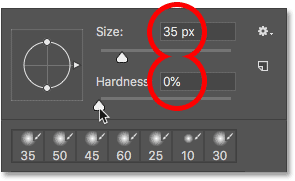
फिर, अक्षरों के शीर्ष पर पेंटिंग करके शुरू करें। पाठ के तेज किनारे आग की लपटों में गायब हो जाएंगे। सीधी रेखा के बजाय अधिक लहराती रेखा से पेंट करने का प्रयास करें: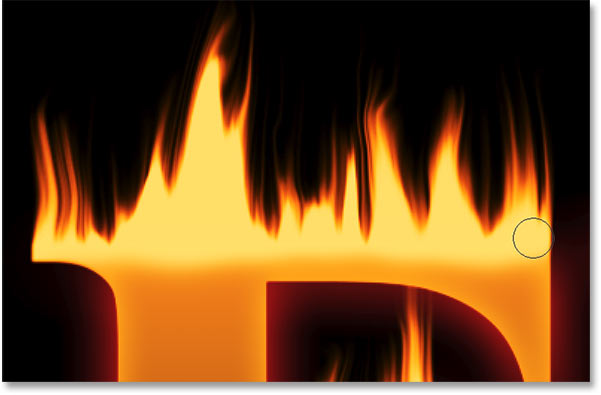
यदि आप कोई गलती करते हैं, तो उसे पूर्ववत करने के लिए Ctrl+Z (जीतें) / Command+Z (Mac) दबाएं। तब तक पेंटिंग जारी रखें जब तक कि प्रत्येक अक्षर का शीर्ष ऐसा न लगे कि वह आग में पिघल रहा है:
जब आप शीर्ष के साथ समाप्त कर लें, तो अक्षरों के मध्य और निचले किनारों के साथ भी ऐसा ही करें, उन्हें आग की लपटों में मिलाने के लिए उनके साथ पेंट करें। यदि आपको ब्रश का आकार समायोजित करने की आवश्यकता है, तो अपने कीबोर्ड पर बाएँ और दाएँ ब्रैकेट कुंजियों का उपयोग करें:
प्रभाव में जोड़ने के लिए, एक बड़े ब्रश का उपयोग करें (दाएं ब्रैकेट कुंजी को कुछ बार दबाएं) और उन क्षेत्रों में चमक जोड़ने के लिए अक्षरों के अन्य किनारों के साथ पेंट करें। अपने अधिकांश ब्रश कर्सर को अक्षर के बाहर रखें ताकि केवल बाहरी किनारा उसके ऊपर से गुजरे:
यहाँ किनारों के साथ पेंटिंग के बाद मेरा परिणाम है। हम लगभग कर चुके हैं:
Part 6: Adding texture to the effect
आइए कुछ बनावट जोड़ें, दोनों पाठ में ही और आग की लपटों में।
Step 31: Add a new layer
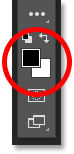
"टेक्स्ट" परत अभी भी सक्रिय है, परत पैनल के निचले भाग में नई परत आइकन पर क्लिक करें: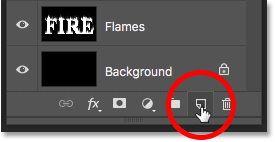
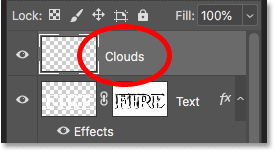
"टेक्स्ट" परत के ऊपर एक नई रिक्त परत दिखाई देती है। हम फ़ोटोशॉप के क्लाउड फ़िल्टर का उपयोग करके एक बनावट बनाने जा रहे हैं, इसलिए इसे हाइलाइट करने के लिए परत के नाम पर डबल-क्लिक करें, और फिर इसे "क्लाउड" नाम दें। इसे स्वीकार करने के लिए एंटर (जीत) / रिटर्न (मैक) दबाएं:
Step 32: Apply the Clouds filter
टूलबार में, सुनिश्चित करें कि आपके अग्रभूमि और पृष्ठभूमि रंग उनके डिफ़ॉल्ट (काले और सफेद) पर सेट हैं। यदि वे नहीं हैं, तो उन्हें रीसेट करने के लिए अपने कीबोर्ड पर D दबाएं::
फिर फ़िल्टर मेनू पर जाएं, रेंडर चुनें और फिर क्लाउड चुनें:
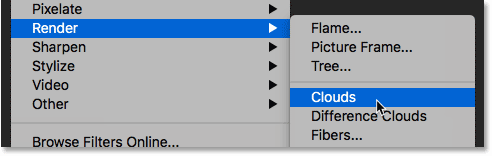
फ़ोटोशॉप परत को यादृच्छिक काले और सफेद "बादलों" से भरता है, अस्थायी रूप से पाठ को देखने से रोकता है:

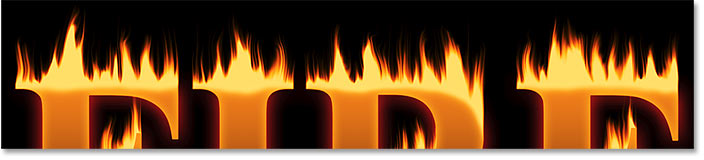
To blend the cloud texture in with the text and flames, change the blend mode of the "Clouds" layer from Normal to Overlay. Then adjust the intensity of the texture by lowering the layer's opacity to around 70%:
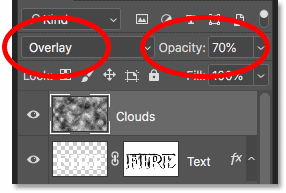
And here's the result with the texture added. It's mostly visible in the text, but you can also see subtle highlights and shadows in the flames:
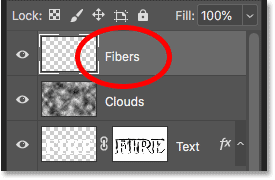
Step 33: Add another new layer
We'll add one more texture, this time to enhance the flames. Click again on the New Layer icon at the bottom of the Layers panel:
The new layer appears above the "Clouds" layer. We'll create this second texture using Photoshop's Fibers filter, so rename this layer "Fibers":
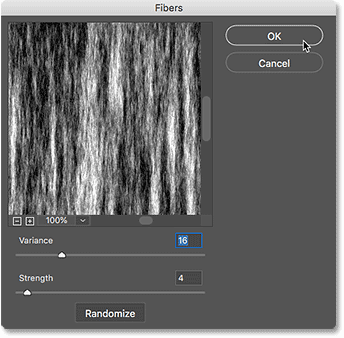
Step 34: Apply the Fibers filter
Make sure your Foreground and Background colors are still set to black and white:
Then go up to the Filter menu, choose Render, and then choose Fibers:

In the Fibers dialog box, just accept the default settings and click OK:
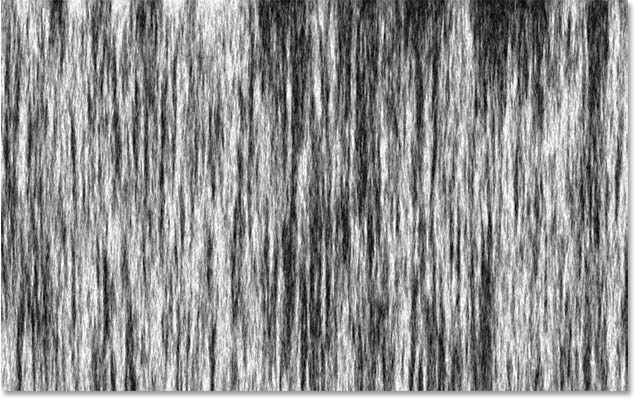
Photoshop fills the layer with a random fiber pattern, again blocking the text effect from view:
Step 35: Blur the texture with Gaussian Blur
Soften the texture by going up to the Filter menu, choosing Blur, and then choosing Gaussian Blur:
In the Gaussian Blur dialog box, set the Radius value to 2 pixels, and then click OK:
![]()
Step 36: Change the blend mode to Soft Light
Then, to blend the fibers in with the flames, change the blend mode of the "Fibers" layer to Soft Light:
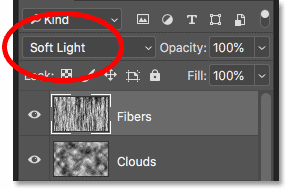
Problem is, this blends the texture not only with the flames but also with the text, which doesn't look right:
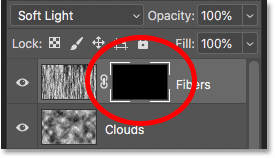
Step 37: Add a black-filled layer mask
To fix that, press and hold your Alt (Win) / Option (Mac) key and click the Add Layer Mask icon in the Layers panel:
This adds a layer mask to the "Fibers" layer and fills the mask with black, which hides the entire texture from view:
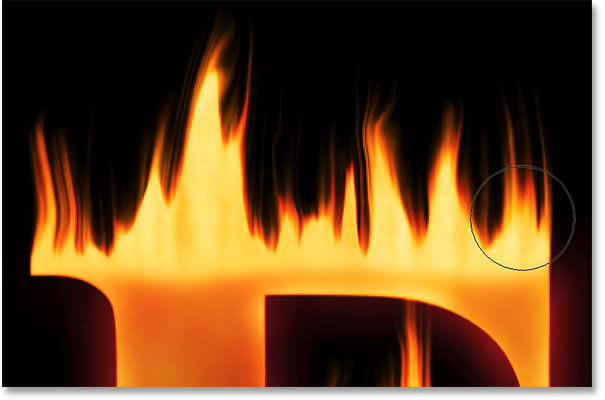
Step 38: Paint back the texture in the flames
Change your brush color from black to white by pressing the X key on your keyboard to swap your Foreground and Background colors:

Then use the left or right bracket keys on your keyboard to change the size of your brush as needed, and paint over the flames to bring back the fibers texture:

)
0 Comments